React Native Routing について
React NativeのRouting
どうも兄です。 ネイティブ開発を行う上で最初にぶち当たるのがRoutingだと思います。 React Show Caseの開発を通じてRoutingを説明できればと思います。
ネイティブの画面遷移
ネイティブの画面遷移はWebのRoutingと異なり、Sceneという画面を積み上げていく形です。
Routing and Navigation in React Native - Dotan Nahum
僕が経験した中で幾つか挙げられますが、ネイティブ開発を行う時躓く所の一つは画面遷移だと思います。 Web -> ネイティブで勝手が違うので特にでしょう。
- Android、iOSで画面遷移の制御が異なる。(IntentとStoryboard)
- 一目でどの画面に遷移するかフローがわからない。
- Tabbar、Navbar、などネイティブ特有の機能の実装が各OSで異なり。手間取る。
React Nativeの画面遷移とは?
では、React Nativeの画面遷移はどうでしょう。
Android、iOSで画面遷移の制御が異なる。がNavigatorというComponentにより解消され、学習コストが下がっていると感じます。
ただし、僕はNavigatorについてあまり、上手く説明ができません。 というのも、Webとの書き方が違う。という問題とReduxの導入のExampleが見つからなかった。という理由で早々に違うルートを選んだからです。
僕が使用しているのはreact-native-router-fluxというライブラリです。 ということで、画面遷移はreact-native-router-fluxを選択して実装していきたいと思います。
react-native-router-fluxとは
React NativeでReact.js ライクに画面遷移を書くことができるライブラリです。 Web -> ネイティブに来る人が多いのか、このようなライブラリは沢山存在します。
- githubの更新日が直近&開発が活発(バージョンアップについてこれるか)
- スターが多い(所謂人気)
- ドキュメント&Exampleが豊富
- Tabbar、Drawer、Directionの対応が容易
- Flux or Reduxに対応できる
上の5つくらいをチェックして、自分の好みにあったライブラリを選択しましょう。 (勿論、React NativeのNavigatorを使っても構いません。)
react-native-router-fluxは上記5つを満たしているのと、
- Sceneの宣言が1箇所に集まるので、どの画面があるのかが一目でわかる。
- 設定でTabなのか、Navの表示非表示ができる。Componentをカスタマイズできる。
など痒い所に手が届くライブラリで使いやすいです。
react-native-router-flux インストール
npm i - S react-native-router-flux
この時 自分のReact Nativeのversionに注意してください。 react-nativeのv0.23.x, v0.24.x & v0.25.xでは使えません。
v0.25.xでタブが前回位置を記憶しないバグがあり、すごく嵌りました。。。issueを漁るとみんな同じ問題で悩んでたみたい。。。 v0.26.xでは大丈夫です。
ちょっと前まではタグ指定でinstallする必要がありましたが、無事masterが更新され、ドキュメントが改変され注意喚起がしてあります。 こうゆうところも開発が活発で安心感があります。
react-native-router-fluxの実装 - 基本形 -
import React from 'react';
import {
  Text,
  View,
} from 'react-native';

import { Router, Scene, Modal, Actions } from 'react-native-router-flux';

import BasicComponents from './containers/BasicComponents'
import ImagePage from './components/ImagePage'

class Route extends React.Component {
  render () {
    return(
    <Router>
      <Scene key="root">
        <Scene key="BasicComponents" initial={true} component={BasicComponents} title="Basic" />
        <Scene key="ImagePage" component={ImagePage} title="ImagePage" />
      </Scene>
    </Router>
    )
  }
}

export default Route;
まずは基本形です。
<Router>で<Scene>を囲ってあげることで遷移するSceneを宣言しています。
initial={true}が割り当てられているSceneAが初期表示画面となります。
componentは、画面です。これは上部でimportしておいてください。
titleはナビゲーションバーのタイトルに設定されます。
各Sceneにはkeyが割り当てられており、keyを元にRoutingを行います。
遷移はとっても簡単で Actions.キー名()で呼び出すことができます。
_onClick(title){
  Actions.ImagePage()
}
また、パラメータを渡したい時は、下のようにJSON形式で渡すことができます。
_onClick(title){
  Actions.ImagePage({title: "drawer", subTitle: "subTitle"})
}
遷移先では、this.propsから取り出して使います。
const {title, subTitle,} = this.props
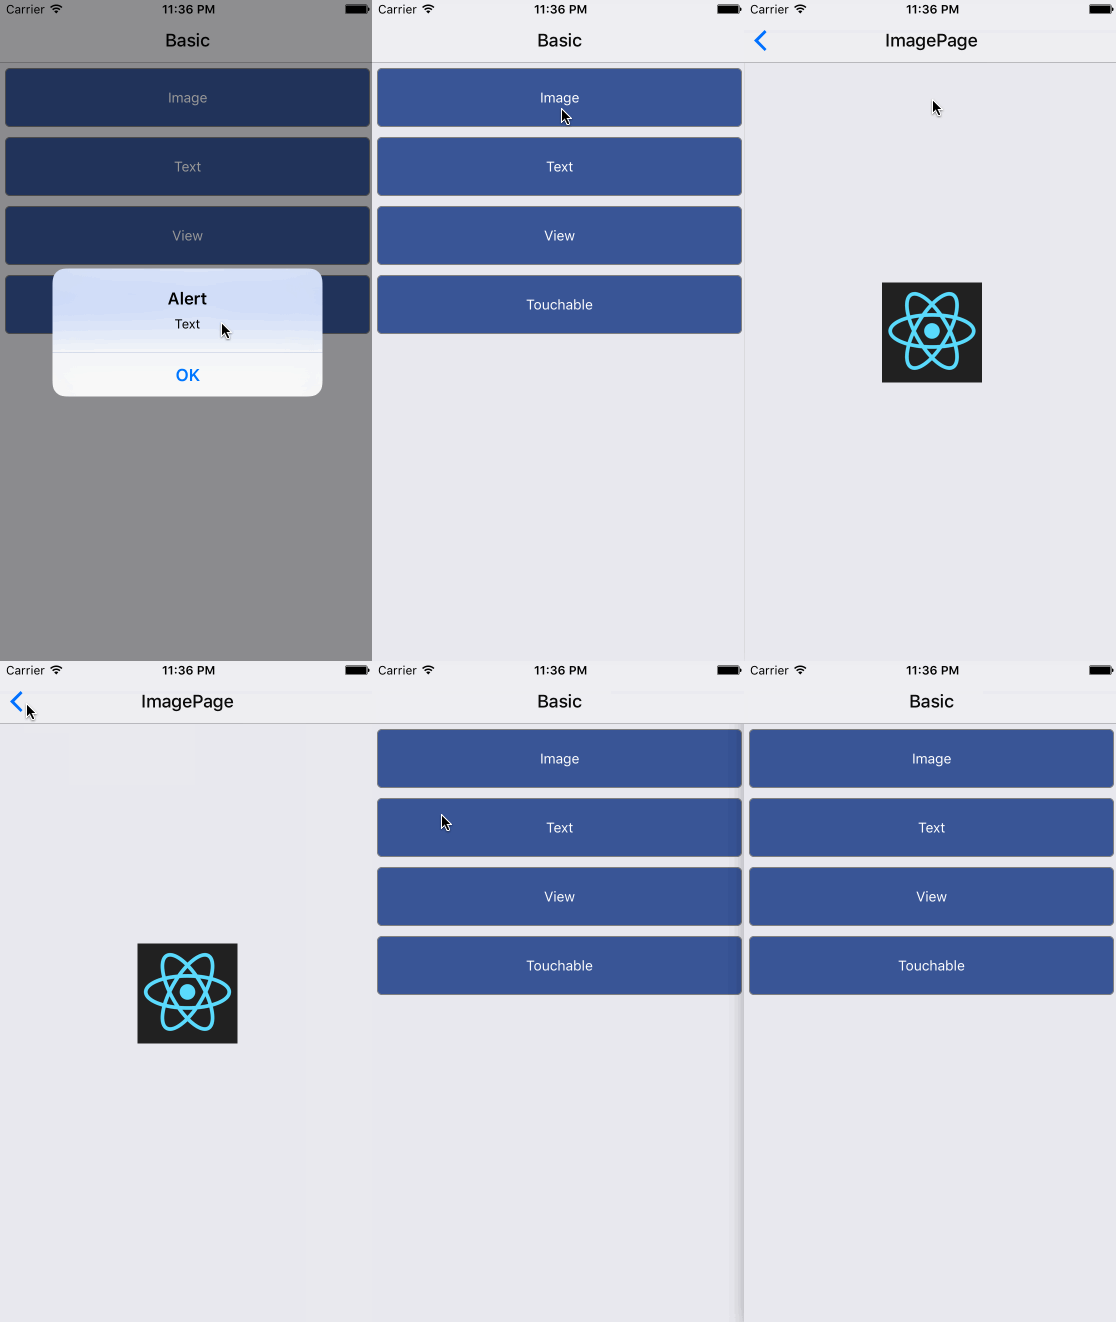
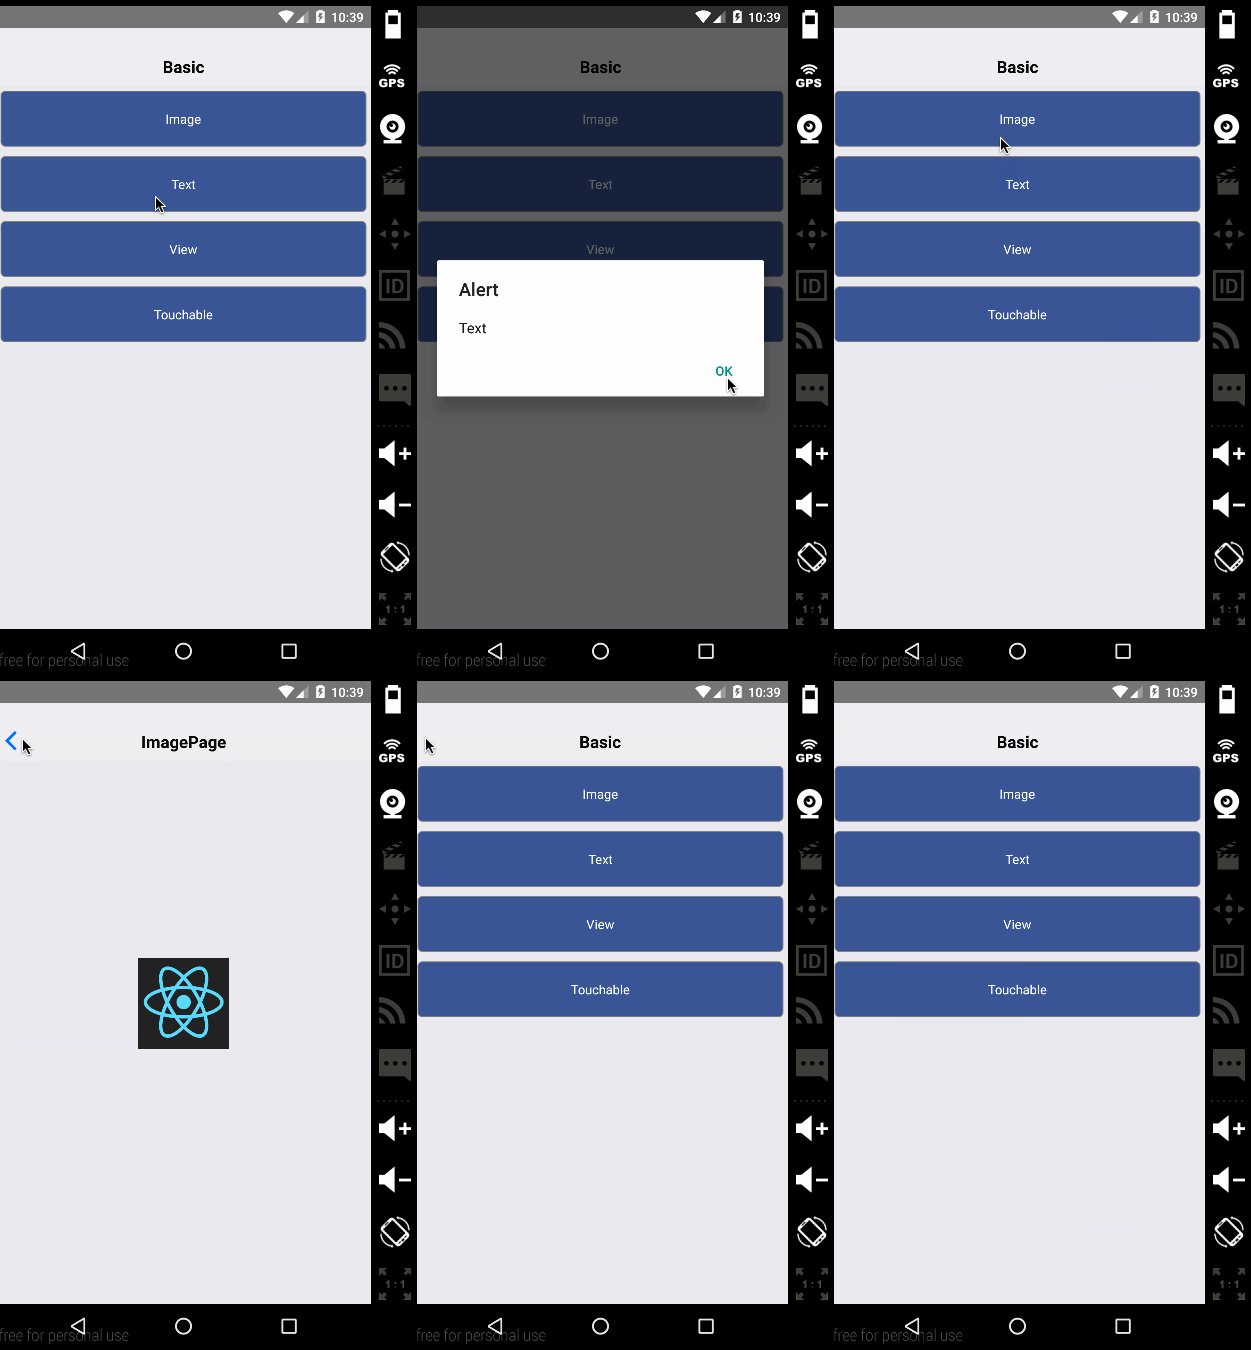
如何でしょうか。
標準のNavigatorも良いですが、Webエンジニアはこちらの方が馴染みがあるのと、遷移先を1ファイルで確認することができるので見通しが良くなります。
通常の遷移は良いですが、しかしながら、ネイティブの多くでは、TabかDrawerの機能の実装を迫られるでしょう。
この時実装に時間がかかる。または複雑であると使うのをためらってしまいます。 今回のShowCaseもカテゴライズしたいのでタブを実装したいと思います。
react-native-router-fluxの実装 - Tab編 -
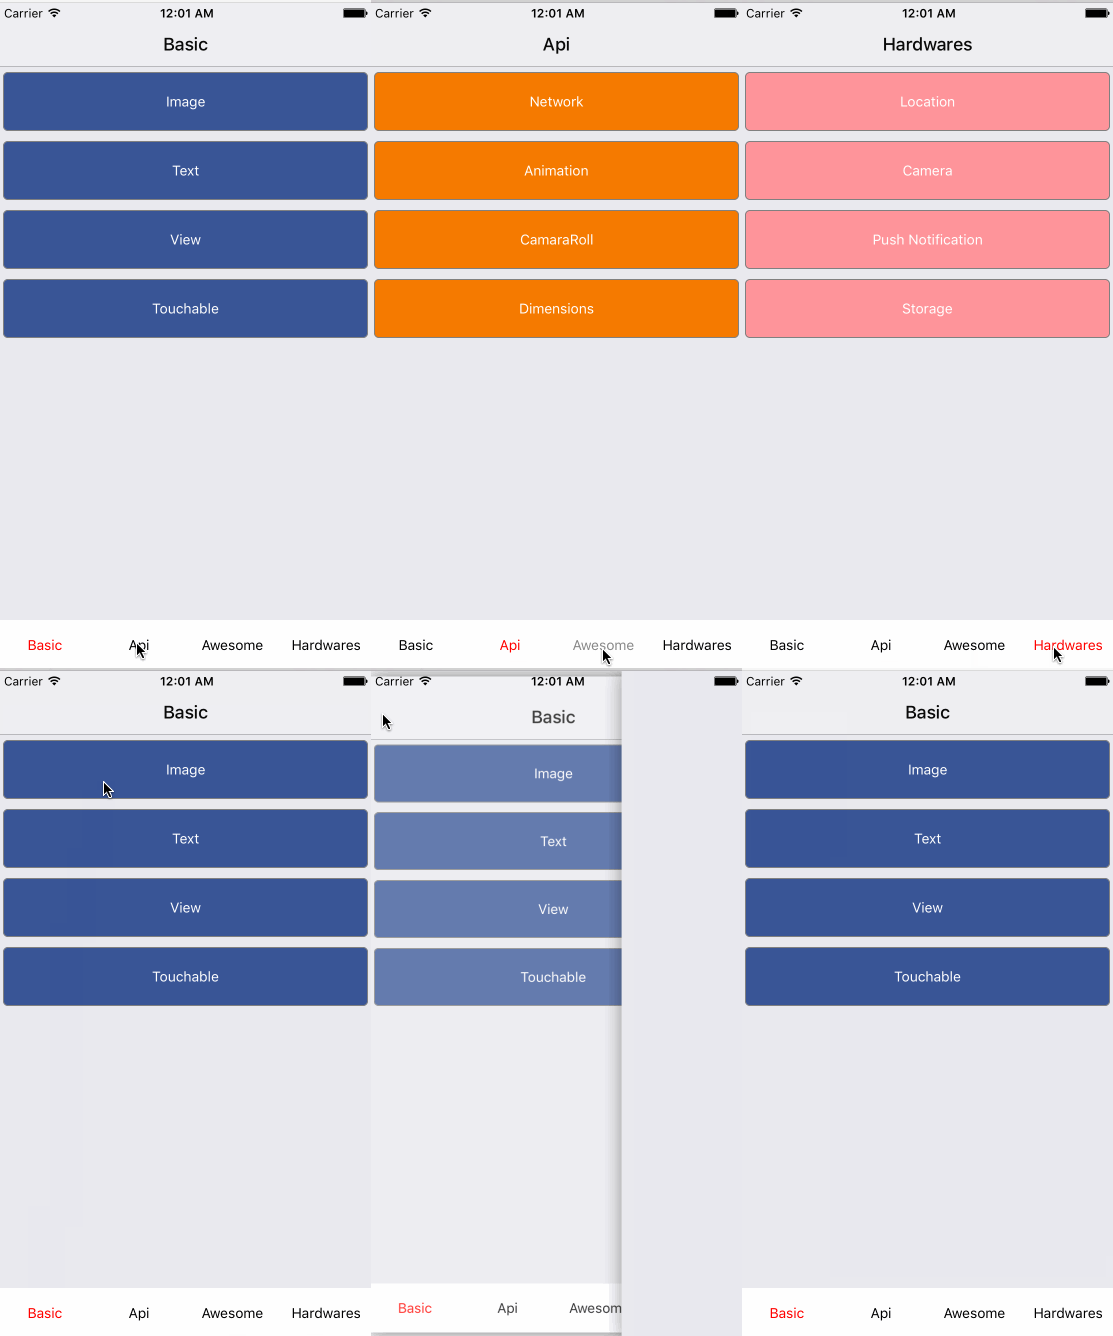
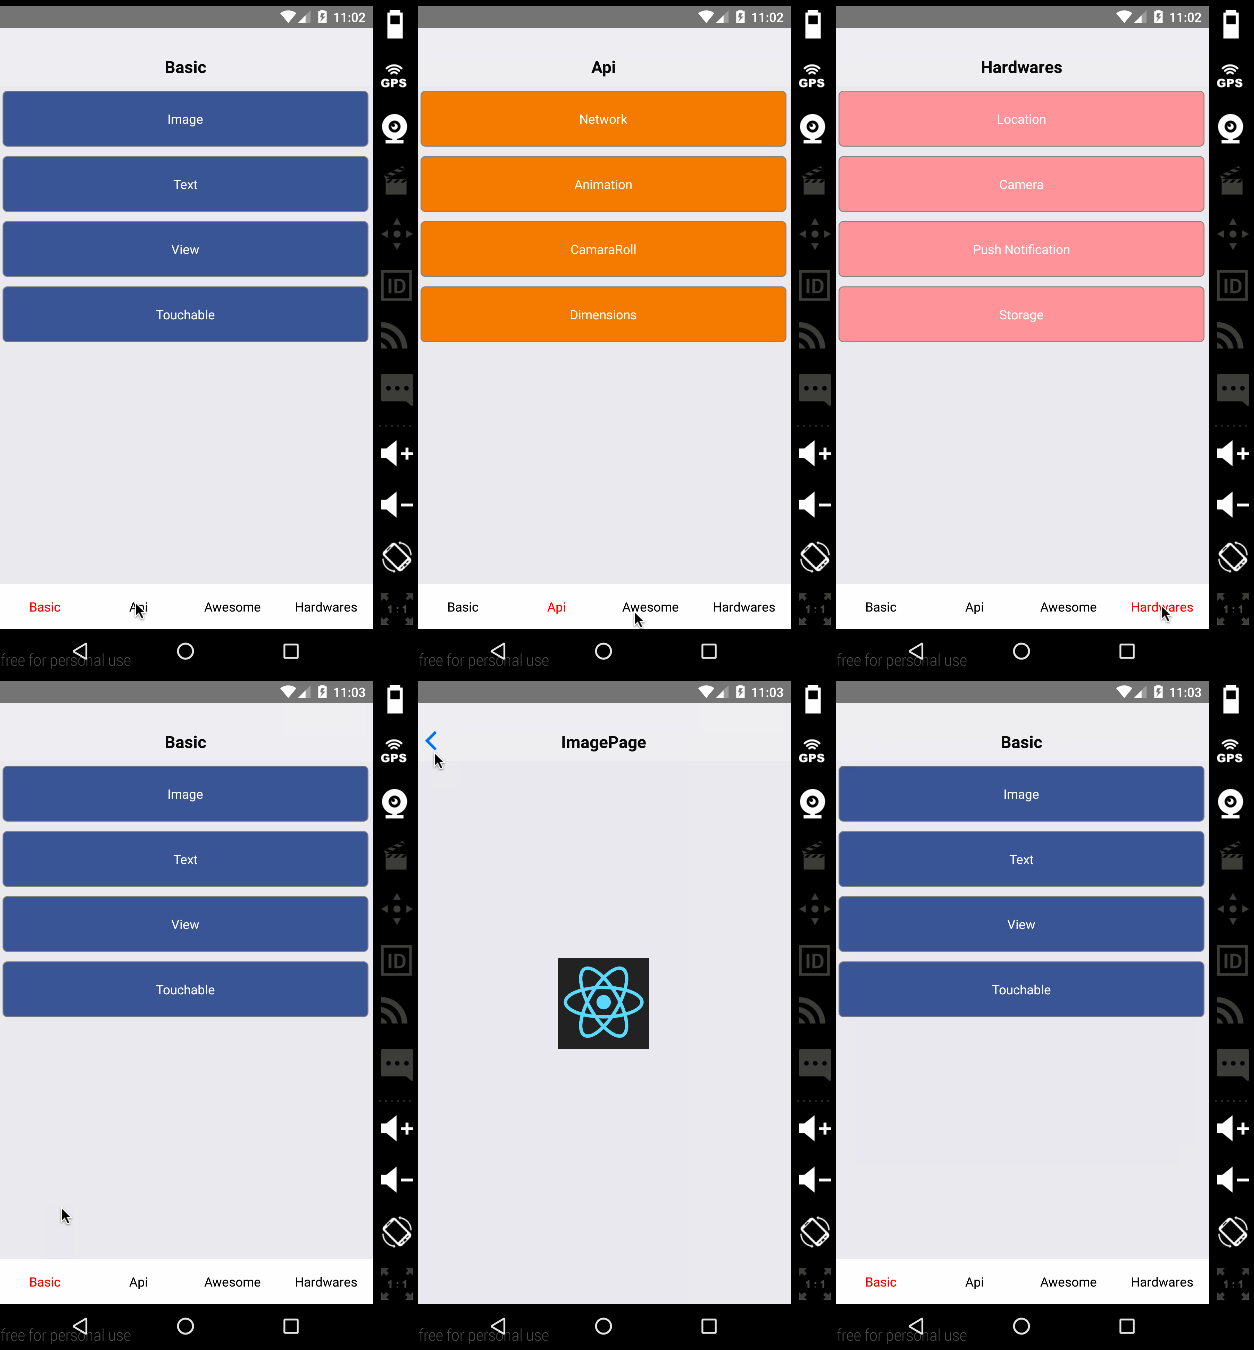
ネイティブ開発では避けて通れないタブの実装です。
import BasicComponents from './containers/BasicComponents'
// 追加
import ApiComponents from './containers/ApiComponents'
import AwesomeLibralies from './containers/AwesomeLibralies'
import Hardwares from './containers/Hardwares'

import ImagePage from './components/ImagePage'

class TabIcon extends React.Component {
  render(){
    return (
      <Text style={{color: this.props.selected ? "red" :"black"}}>{this.props.title}</Text>
    );
  }
}

class Route extends React.Component {
  render () {
    return(
    <Router>
      <Scene key="root">
        <Scene key="tabbar" tabs={true}>
          <Scene key="BasicComponents" hideNavBar={false} initial={true} component={BasicComponents} title="Basic" icon={TabIcon}/>
          <Scene key="ApiComponents" hideNavBar={false} component={ApiComponents} title="Api" icon={TabIcon}/>
          <Scene key="AwesomeLibralies" hideNavBar={false} component={AwesomeLibralies} title="Awesome" icon={TabIcon}/>
          <Scene key="Hardwares" hideNavBar={false} component={Hardwares} title="Hardwares" icon={TabIcon}/>
        </Scene>
        <Scene key="ImagePage" component={ImagePage} title="ImagePage" icon={TabIcon}/>
      </Scene>
    </Router>
    )
  }
}

export default Route;
こんな感じでしょうか。
タブの箇所を<Scene key="main" tabs={true} ></Scene>でぐるっと囲みました。
iconにはComponentを指定してください。iconを指定しないとタブが表示されなかったと思います。
TextでもImageでもiconでも指定することができます。
react-native-router-fluxの実装 - Drawer編 -
タブと合わせて設定のためにDrawerも必要だよ。という要望も出てくると思います。 ではDrawerの実装はどうでしょうか?
必要なライブラリをinstallし、
npm i -S react-native-drawer
Drawerとその中身を用意します。
import React, { PropTypes } from 'react';
import Drawer from 'react-native-drawer';
import { DefaultRenderer } from 'react-native-router-flux';

import TabView from './TabView';

class NavigationDrawer extends React.Component {
  render() {
    const children = this.props.navigationState.children;
    return (
      <Drawer
        ref="navigation"
        type="displace"
        content={<TabView />}
        tapToClose
        openDrawerOffset={0.2}
        panCloseMask={0.2}
        negotiatePan
        tweenHandler={(ratio) => ({
          main: { opacity: Math.max(0.54, 1 - ratio) },
        })}>
        <DefaultRenderer navigationState={children[0]} onNavigate={this.props.onNavigate} />
      </Drawer>
    );
  }
}

export default NavigationDrawer;
import React from 'react';
import {StyleSheet, Text, View} from "react-native";
import Button from 'react-native-button';
import { Actions } from 'react-native-router-flux';

const contextTypes = {
  drawer: React.PropTypes.object,
};

const styles = StyleSheet.create({
  container: {
    flex: 1,
    justifyContent: 'center',
    alignItems: 'center',
    backgroundColor: '#F5FCFF',
    borderWidth: 2,
    borderColor: 'red',
  },
});

const TabView = (props, context) => {
  const drawer = context.drawer;
  return (
    <View style={[styles.container]}>
      <Text>Tab {props.title}</Text>
      <Button onPress={Actions.pop}>Back</Button>
      <Button onPress={() => { drawer.close(); Actions.BasicComponents() }}>Switch to tab1</Button>
      <Button onPress={() => { drawer.close(); Actions.ApiComponents() }}>Switch to tab2</Button>
      <Button onPress={() => { drawer.close(); Actions.AwesomeLibralies() }}>Switch to tab3</Button>
      <Button onPress={() => { drawer.close(); Actions.Hardwares(); }}>Switch to tab4</Button>
    </View>
  );
};
TabView.contextTypes = contextTypes;

export default TabView;
Componentが用意できれば、Drawerが必要なところを<Scene>でぐるっと囲みます。
import Drawer from './components/Drawer'

…

class Route extends React.Component {
  render () {
    return(
    <Router>
      <Scene key="root">
        <Scene key="tabbar" component={Drawer}>
          <Scene key="main" tabs={true} >
            <Scene key="BasicComponents" hideNavBar={false} initial={true} component={BasicComponents} title="Basic" icon={TabIcon}/>
            <Scene key="ApiComponents" hideNavBar={false} component={ApiComponents} title="Api" icon={TabIcon}/>
            <Scene key="AwesomeLibralies" hideNavBar={false} component={AwesomeLibralies} title="Awesome" icon={TabIcon}/>
            <Scene key="Hardwares" hideNavBar={false} component={Hardwares} title="Hardwares" icon={TabIcon}/>
          </Scene>
        </Scene>
        <Scene key="ImagePage" component={ImagePage} title="ImagePage" icon={TabIcon}/>
      </Scene>
    </Router>
    )
  }
}

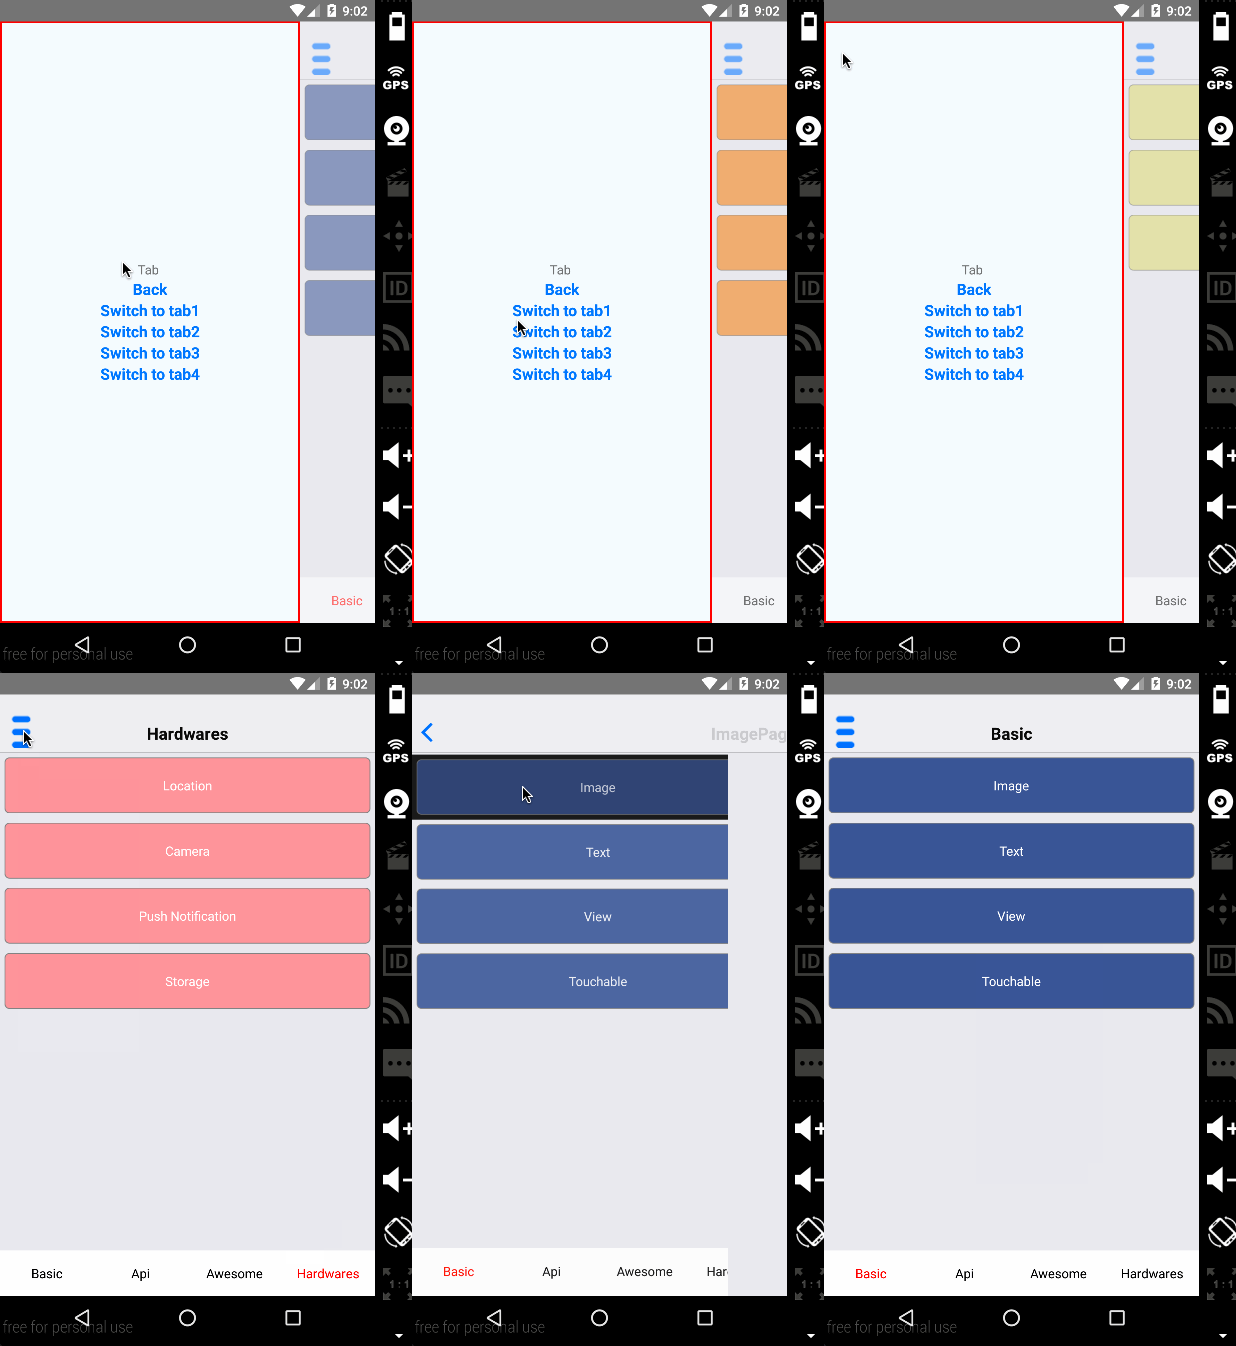
最後に
意外と簡単だったではないでしょうか。
僕自身はandroidは2.x系以来なのでDrawerの実装をしたことがないですし、タブの実装方法も忘れました。
それなのにiOS、androidを意識することなく、1ソースで簡単に書けたことに感動です。 React Nativeは1ソースを謳っていませんが、ライブラリで上手いこと吸収してくれてるのでしょうか。
興味深いですね。時間がある時ソースを追えればと!
react-native面白そうだけど、TabとかDrawerとか、どう実装するの? という疑問に少しでも手助けになると幸いです。
また、上記のソースは1から実装したのではなく、かなり、Exampleを参考にしています。 とてもわかりやすいので一度目を通してみることをお勧めします。 github.com
長くなったのでこの辺りで!
